Previously we talked about why CI is important for you and your organization. Today I’ll show you how easy it is to setup with Azure DevOps. I’ll show it on my private (open-source) project. As you may know MS introduced free public repositories. Your open source projects can use everything that MS prepared for their paid clients for free.
Azure DevOps let you create build pipeline with 2 approaches, Visual Designer or YAML file.
Create build with Visual Designer
It is the easiest way to create build pipeline. You don’t need any knowledge to start, just where to click to begin 🙂
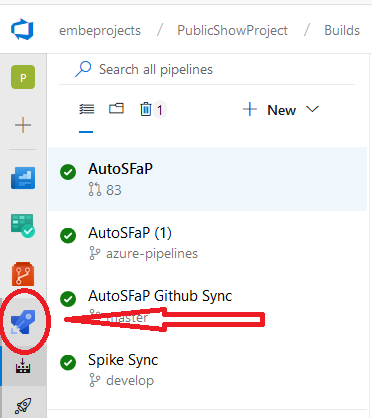
When you click New, Azure DevOps will walk you thru basics, YAML build is default, so you’ll need to click “use the Visual Designer”. It’s even better, Azure DevOps will configure for you simple build which will compile your code, run tests and publish results. For start it’s all you need. I’ve been using Bamboo and Azure DevOps now, I can say without doubt that Azure DevOps presents completely different level. I had hard time with Bamboo to just show test results. Here everything was preconfigured from beginning.
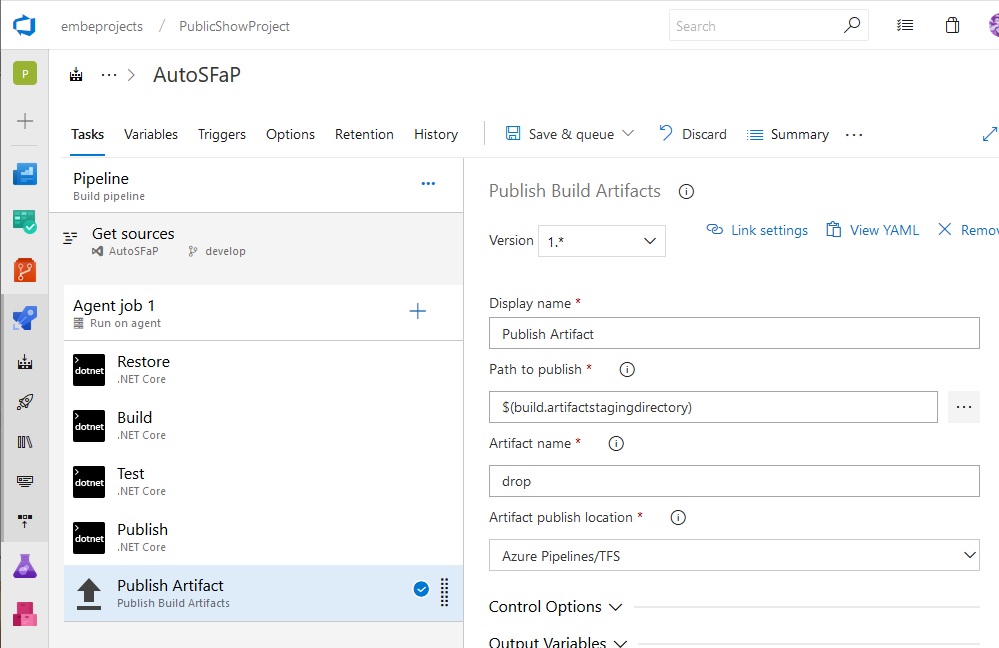
When you’ll select template you’ll see something like that. In my case I’ve selected .Net Core template. Azure DevOps created for me pipeline with 5 steps. First build agent will checkout code from my repository, I’m keeping my code on Azure DevOps so it doesn’t needed any configuration. You can use Github repository as well. Code checkout step is hidden.
First visible step will restore nuget packages, then build solution. After that it will run tests and publish results. Publish step will prepare files ready to deploy, finally agent will create artefact which we’ll talk about in future during posts about Release pipelines. For now we’ll simplify topic to minimum. Artifact are files that are needed to deploy application, release pipeline will use those artifacts to deploy them on server or we can use them for manual deploy.
4 steps from top are one and the same task which is called simply .Net Core. It will run dotnet cli commands dotnet + {specifiedCommand} for example dotnet restore, dotnet build etc. If you would like to, you can change your pipeline to use powershell/bash script. There are multiple ways to achieve the same thing and it’s up to you which one will you use.
Hierarchy
Pipelines consists of Jobs and Steps. By default there is only one Job, but you can add more if you want. Job will let you make something parallel to another Job. Additionally you can set that Job will wait till another Job finish or start only if another Job fails. You have full control on how your pipeline will flow.
Every Job contains steps or tasks these names are interchangeable. Tasks are executed one by one. You can set if pipeline should fail after one of task fails or if it should go on. MS prepared preconfigured tasks, but if you want you can use console task which will run commands on agent’s console or even powershell/bash script. Additionally you can create your own task or templates. We will create our own task and template in near future, after AutoSFaP presentation.
Variables
One of the best thing are build variables. You can create variables for your build to make it easier to read or share common variables between more steps or even builds. You can specify variables in tab Variables. There are two types of variables, Pipeline variables and Variable groups.
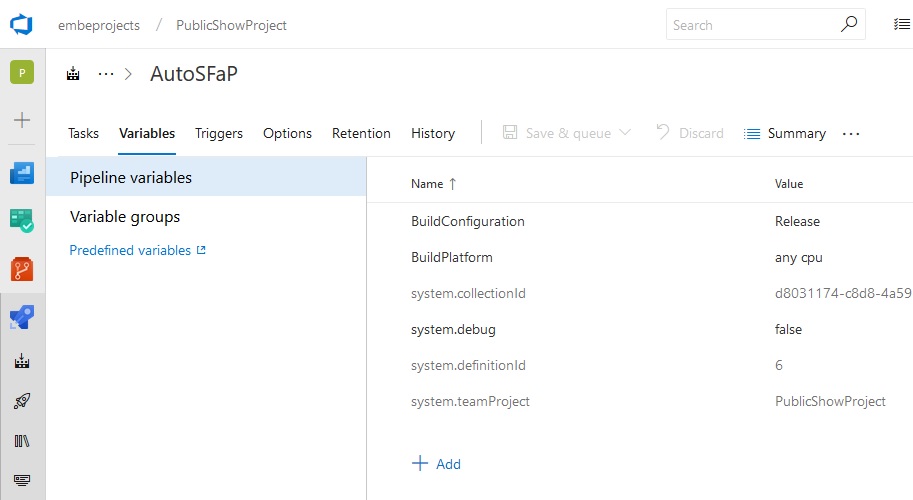
Pipeline variables
If I would need to compare them it would be like local variables in C#. There are available only in present pipeline and won’t be shared anywhere. Additionally Azure DevOps starts with predefined variables
Variable groups
Variable groups are… well group of variables that you can use in multiple pipelines. You can set there credentials for additional repository or path to fileshare. Whatever you need to specify in two places you can put in variable group and use it from there. To create variable group you can click on Manage variable groups. Link will take you to page where you’ll be able to create new variable group.
One additional thing, to use variable group you need to link it to pipeline. You can do that by clicking Link variable group, from that point it’s easy as a pie.

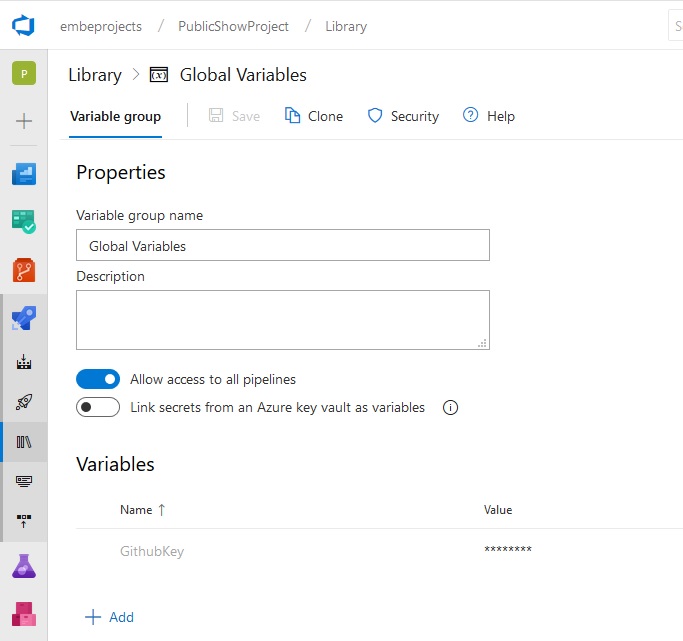
Another way to create new Variable Group is click Library on sidebar. When you click Add button you’ll see page where you can specify group name and description. At the bottom you can add new variables. As you can see I’ve created my variable with GithubKey. The key is encrypted so even I can’t see what’s inside, but if you want you can create plain text variables.
Triggers
Finally something that will make our build continuous. Here we can set or build to trigger whenever something happens.
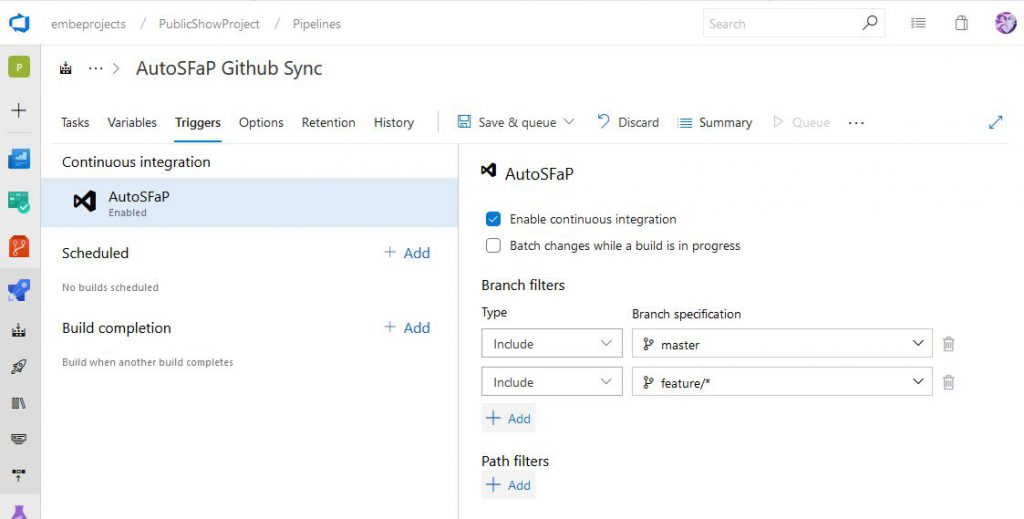
First you need to check Enable continuous integration button, then you can select which branches should trigger build. In my example build will trigger when there are new pushes to master or any feature branch. You can also use wildcards, as you can see in screenshot above.
Apart from that, you can schedule your build or trigger your build when another completes.
Outro
As always MS created great documentation about Azure DevOps, you can find it here . It doesn’t make sense if I would cover the same thing again here. I provided quickstart and will cover some border cases. You can learn more basics from MS articles. If you have problems, you can reach me, or check MS articles.
- Build Agents
- Build Variables
- Variables
- Scripts in build
- Variable Group
- Conditions
- Job, Steps Templates
- Using Other repos
- Task
- Job
- Azure “Powershell”
Next time we’ll talk about creating YAML build pipeline.