Previously I’ve presented how to setup simple Azure DevOps pipelines using visual designer. Additionally to that some basic concepts of Azure DevOps. Azure DevOps let you create build using YAML files which you can push to your repo and edit in text editor.
What’s the difference?
To be completely honest, I can’t really tell. There are feature available only for YAML. You can use Visual Designer features while creating build from YAML file, so it may be better idea to start off from YAML.
Additionally you can display YAML file of build created by Visual Designer by clicking View YAML in main editor. So it doesn’t really matter which approach you use. Visual Designer is far easier to start, but when you’ll learn how to use YAML you’ll be able to push your whole pipeline in repository and review changes in Pull Requests. Other people will be able to see your build without having full access to repository. You’ll be able to control changes in your builds.
How to setup CI build with YAML?
Basic setup is the same as with Visual Designer, but YAML is default, so we don’t need to select anything else. The same as with Visual Designer Azure DevOps will setup for you preconfigured pipeline. Unfortunately problems start here. YAML build is completely different than Visual Designer build, it’s harder to understand without basic knowledge. You’ll need to learn some of keywords used in YAML pipeline, but it shouldn’t be a big deal. Experienced developer should be able to learn basics in just one day.

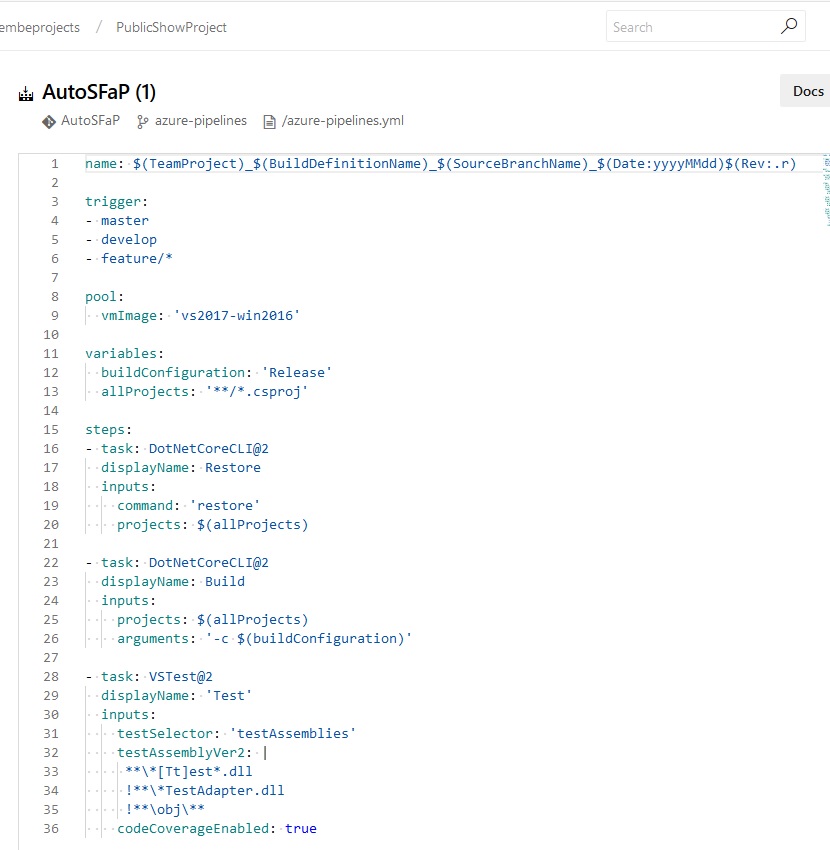
This is my build changed a little to suit my needs. Azure DevOps has text editor in which you can edit your build, but you can also use VS Code or any other text edit. From Azure DevOps you can push your changes straight to master or create Pull Request for it. You don’t need to push to master to test your build. You can run build from feature branch and check if more changes are needed.
File scheme
Now that we know how to create YAML pipeline we should learn a little about what’s inside that file. I’ll describe briefly every important aspect, but for detailed information you should check MS articles. I’ve pasted them in previous post.
name
name: $(TeamProject)_$(BuildDefinitionName)_$(SourceBranchName)_$(Date:yyyyMMdd)$(Rev:.r)It’s going to be name of our build displayed in history. It’s not name of build pipeline, but individual run. As you can see, I’ve used predefined variables provided by MS. It should be clear.
trigger
trigger:
- master
- develop
- feature/*
Here we can specify when our build should be triggered. My build will run every time something is pushed to master, develop or any feature branch. It’s worth to mention that Visual Designer overrides YAML configuration, so if you want to set it via YAML, you need to disable it in Visual Designer.
pool
pool:
  vmImage: 'vs2017-win2016'
Here we can specify on which agent build should be run. I’m using agents provided by MS, because my project is open source. There are multiple agents that will suit anyone’s needs. I needed agent with visual studio installed, because one of my steps need VS2017.
variables
variables:
  buildConfiguration: 'Release'
  allProjects: '**/*.csproj'
Here you can specify your variables. Nothing fancy.
task
steps:
- task: DotNetCoreCLI@2
  displayName: Restore
  inputs:
    command: 'restore'
    projects: $(allProjects)
First step is dotnet restore. In projects input we can specify which projects should have their nuget packages restored. We want to restore every project. As you can see, I’m using variable defined above.
- task: DotNetCoreCLI@2
  displayName: Build
  inputs:
    projects: $(allProjects)
    arguments: '-c $(buildConfiguration)'
Then we dotnet build our projects. The same as with restore we need to specify which projects should we build. Additionally we can specify build arguments. I’ve added only one, should it build Debug or Release version.
- task: VSTest@2
  displayName: 'Test'
  inputs:
    testSelector: 'testAssemblies'
    testAssemblyVer2: |
     **\*[Tt]est*.dll
     !**\*TestAdapter.dll
     !**\obj\**
    codeCoverageEnabled: true
Last step runs tests and publish results. I could’ve use dotnet test but I wanted to publish code coverage in results as well and dotnet test can’t do that without additional work, while VSTest task can. It would cost more for private projects, because build agent needs VS2017 installed on it, but my project is open source, so I have everything for free.
Display YAML of Visual Designer
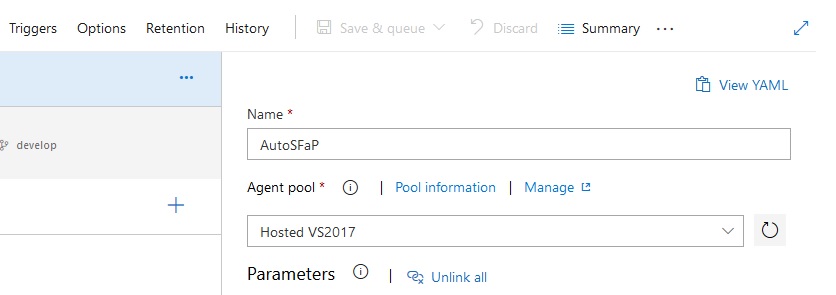
At the beginning I said you can show any build as YAML. Your Visual Designer build can be viewed as YAML as well. To do that, you need to open your build and then click View YAML. You can display whole build or selected task.

Outro
As you can see YAML pipelines are pretty easy, there is higher entrance threshold, but it’s not that hard to learn. Still using Visual Designer is even easier. What makes me using YAML instead of Visual Designer is possibility to work without changing tool. I don’t need to use Azure DevOps to change my build. I can just change build from Visual Studio just like any bug fix or new feature. Additionally I can show my build pipelines to anyone, because it will be pushed to repository.